Guest Blogger, Morgan Antoinette: 5 Benefits of Hiking

5 Benefits of Hiking

hiking (2 of 7).jpg

Going hiking is a great chance of unwinding, seeing things, and maybe also reuniting with your friends every once in a while. Some people really do love hiking, whereas others don’t really understand what it is about.

If you are one of the latter, then maybe our top comprised of 5 benefits that you most probably never knew about will motivate you more. There could be plenty of reasons why some people don’t like hiking, but one of them could be that they don’t really know what they can get from such trips.

In fact, even if you are a big fan of hiking, these 5 benefits of monthly hiking or even camping could open your eyes. You probably know that hiking is good for you, but did you know how exactly?

So hopefully, you understand what we mean by that after you go through the 5 benefits of hiking every month that you have probably never heard of. Who knows, maybe we even motivate you enough so you dedicate some more time and effort to going out hiking every month!

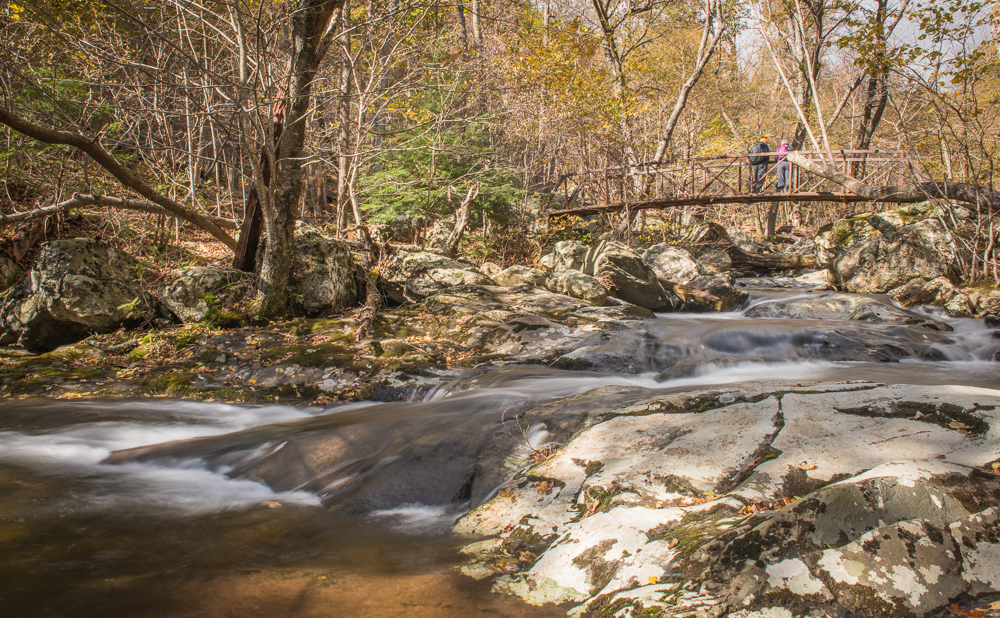
Hiking allows you to socialize

Hiking is a great opportunity to meet new friends that share the same interests and maybe even some craziness with you. Experiencing memorable moments will allow you to become closer to your friends and relatives and to also meet entirely new people.

Besides, having some buddies alongside during a tough hike may serve as the strong stimulus that you needed. Hiking is a kind of a workout, and let’s be fair, working out can be boring if you don’t have anyone to share your experience with.

hiking (6 of 7).jpg

More control over your workout

People mostly train in the gym with a coach. Sometimes, you just can’t stand the bossy instructions of your fitness trainer and instead want to be able to adjust the training intensity yourself. Hard training has its own benefits, but you sometimes may want to just do what you want.

Well, hiking provides excellent opportunities for that. Because there is no one to tell you what to do, you and your motivation will decide how tough it will be. Your hiking buddies may tease you over the journey, but that will just playfully motivate you to do more.

There are plenty of ways you could make your hiking journey harder or easier with. Before you actually go hiking, you could choose a harder and longer or an easier and shorter route. And even if you are already on the trail, you still could complicate or facilitate the hiking by choosing steeper hills or avoiding them. You could also, for example, pack some extra stuff with you to make your backpack heavier.

Regardless of what your goal is, you could find many original ways of tweaking the hiking to your skill level and tasks. You don’t necessarily have to change trails every time you go hiking: your imagination alone could make a single trail very challenging for you.

Health benefits

It’s no secret that hiking is beneficial for health. However, do you know how exactly hiking could benefit you?

The first benefit would be connected to excess body weight. Active hiking burns at an average of 200 calories per hour at a moderate hiking pace of 2 miles per hour. Needless to say, the quicker the pace, the faster you will burn the calories, so you could benefit from fast hiking even more.

Consistent exercise may also lower blood sugar levels, which in its turn may decrease the risk of developing type 2 diabetes. Besides, regular movement should positively impact your bones and joints and allow you to avoid arthritis and osteoporosis.

Another benefit of hiking is sun exposure: if the day is sunny, you could easily get your daily vitamin D in 10 – 20 minutes. You’d need to wear a sunscreen though because overexposure results in sunburns or even worse things!

hiking (1 of 7).jpg

Improved creativity and problem-solving

Having a mental break in the form of hiking apparently is also very beneficial for your reasoning. A couple years old study discovered that spending several days hiking in nature drastically increased the participants’ problem-solving and creativity. So it turns out that hiking is beneficial both for the body and for the mind.

Most of the time, you probably won’t be doing hikes lasting several days. However, even shorter hikes could allow you to unwind and restore your mental resources.

Working every day for a long time without vacation may make you feel numb. Focusing on the easiest tasks could become very difficult, so you may be unable to enjoy even the moments of rest and isolation. If that’s exactly how you feel like, then taking the chance of hiking every once in a while – possibly, monthly, if your job allows that – would surely be beneficial for you. Take that hiking survival kit and get started, now!

Improved mental health

Multiple studies – including one conducted at Stanford University in 2015 – demonstrated that merely a daily walk greatly increased the positive emotions in the participants.

Another study compared the levels of rumination (brooding) in two groups: one walking in green areas and the other in urban areas. The results were that the “brooding” was significantly reduced in the “green” group.

A study conducted by Finnish researchers discovered that even short walks out in nature considerably reduced the level of stress in participants when compared to walks in urban areas.

Theories of the so-called “nature deficit disorder” in humans have long been circulating among scientists and researchers. This disorder is characterized by a lack of exposure to nature and green areas and ensuing increased level of stress.

While the negatives of nature deficit in humans aren’t established decisively by science, more and more studies come to the same conclusion: exposure to nature positively impacts the participants.

Thereby, hiking is an excellent opportunity of getting out of the stressful urban areas into the embrace of nature. The effect of hiking may not be as noticeable in those who live in countryside areas (since they are exposed to nature to a greater extent), but it will still be there. Even more so if happen to live and work in a city!


Write by Morgan Antoinette.

Read more from Morgan by clicking the links below

Smooth Water Photography

Smooth water Photos are long exposures that give moving water a smoothed out or misty look. It is a beautiful an unique look that is easy to pull off with the right settings.  

Meet the Smiths

In January of 2018 my family and I headed off to camp at Hillsborough River State Park near Tampa Florida for my daughter birthday. This also happens to be the park where I asked my wife to  marry me. 

On this trip we had the privilege of meeting the Smiths!  

IMG_3365.JPG

Blake and Lindsay with the help of their children Sawyer, Oona, and Mavi  converted this 1996 Thomas International School Bus into their new home. 

On a walk around the campground loop with my wife, daughter, and grandson we met Blake and Sawyer out riding his bike getting some practice before a second attempt at removing his training wheels. As kids often do my grandson was instantly drawn to someone closer to his own  height and  began following his newly found friend around. 

This gave me some time to talk to Blake. He told me that his family own the School bus.

Now I had noticed the school bus on the loop the second we pulled in, how could you not. School buses converted into motor homes are not that uncommon, as the size and structure lends it self to easily house all the proper amenities. 

What is a little more uncommon is the fact that the bus was not their home away from home it is their actual home. 

Blake explained that the couple just wanted a simpler life, one that focused more on enjoying time with their children and having experiences as a family. To do this they would need to let go of a lot of “Stuff”. Declutter their life so they can focus on what truly matters, Family. 

I got an opportunity to get on the family’s bus, named “The Fair Warrior” . The name actually comes from the meaning of their first daughters name Finley who tragically passed away at just 2 weeks old. 

Once on the bus I was very surprised how much like a home it actually felt. Blake and Lindsay showed me around as any proud homeowner would. It had all the basics, Kitchen, bath, toilet, master bedroom, bunk beds and a great open living room area. It was hard to believe that what was once just some old brown green bench seats that carried kids back and forth to school is now all of this!

I can truly tell you that this family had a closeness that I can’t explain with words. Letting go of the 9-5 work day, stress,  mortgage payments, car payments... really changes the family dynamic. 

The family is doing volunteer work at the park. This allows them to stay and enjoy this life they have created with each other. Once the work here is done they will find another place to volunteer and travel. I wish them all the best and I am truly blessed for having the opportunity to meet them. 

Follow them along on their journey on Instagram here.  

How many times do you meet people who are actually living out their dream?  

Condensation

IMG_2706.JPG

Here is some thing you might not know or maybe have just never thought of.  

Have you ever noticed that on a cold morning when you get into your car the windows will have water ( condensation ) on the inside of your car? How about if you have something cold like a glass of cold water and it is a hot day the outside of the glass gets wet ( condensation ). This water build up always happens when you have two things that have very different temperatures because the cold pulls the moisture out of the warm air. 

Your camera equipment is no different. Something I deal with on a daily basis here in FL is  condensation. My equipment sits in an  air-conditioned building over night and the internal temperature of my gear gets down to 75 degrees Fahrenheit. In the morning I walk out the door into 95 degrees and 90 percent humidity. Now the camera being made of metal, glass, and plastic does not change temperature  immediately so it is basically like holding that cold glass of water.  Condensation builds up fast. You can  visibly see the  condensation on the glass and  through the eyepiece, maybe even feel the water on the metal parts of your gear, but what you can not see is the water that has formed on the  components inside your camera like the sensor and circuit boards those are what you need to be concerned about most. 

Now for the tip!  

DO NOT TURN YOUR CAMERA ON. 

Well at least not right away. The best thing to do is to take your camera out of your gear bag and let it sit for a few minutes (I do 15-20  minutes) so the internal temperature matches that of the air around you. It is extremely important not to turn the camera on during this time because small droplets of water my be sitting on your cameras circuit board and making contact across many different circuits. Adding an electric charge could permanently damage your camera. Some cameras have a “CON” icon that will flash on the LCD readout to tell you  condensation might be present.   Condensation is not only a summer problem so remember that if you camera is not the same temperature as the air around it you will have  condensation. If you are out in the snow and go inside a warm house give your gear a few minutes to  acclimate to this new temperature. I hope this tip helps protect your investment and keeps you out in the field doing what you love!

Get Out There!

Composition Rule #3

Leading Lines! 

Here are some examples of leading lines

The third rule of composition is "Leading Lines". The idea is to use defined lines in an image to make the viewers eye follow along from one area of the image to another. The line can be anything, roads, trails, fence line, rivers, train tracks... These are some of the more obvious ones. Try useing shorelines, tree limbs, a cresting wave, a crack in a rock, or maybe a row in a beautiful garden to carry the viewers eye through the shot.

Leading lines work very well portraying depth in your image. A diagonal line across your image will make the viewer feel distance. In the night shot above taken in Reed Bingham State Park in GA you can tell exactly how much distance is between each of the trees because the line gets thiner as it gets farther away. As the line weaves in and out of the pines it adds depth.

Battery Life

IMG_0998.JPG

With more and more technology getting packed into DSLR cameras comes a greater need for power. Even with better and more efficient batteries the demand for power is often times what cuts a good day out in the field short. so apart from spending tons of money buying batteries here are a few ways you can extend your day and your cameras battery life.

1. LCD Screen. The convenience of having a beautiful large LCD screen on your camera is huge. But the LCD screen is the single biggest waster of power on your camera, AVOID using it whenever possible! turn it off! If not off, set your preview mode to the shortest possible time and turn the brightness down. Never use the screen to set up your shots in live preview mode. the viewfinder on the camera gives you everything you need with next to know power usage.

2. Continuous Focus. Unless you are shooting animals, kids, or sports turn this feature off. Landscapes are not Continuously moving so this feature is not doing anything but eating up precious battery life. Your camera is constantly looking for something to change so it can run the servos to readjust focus. Don't get me wrong in the right moment this feature is a necessity, buy not all the time.

3. Flash. Only use the flash when necessary. Luckily for Outdoor Photographers flash is hardly ever needed.

4. Don't Delete. This will be a tough one for sum. DO NOT DELETE PICTURES IN THE FIELD! when I go out with other Photographers or when I see people taking photos outdoors, this is normally what I see... Live preview mode, Snap the shot, check the preview, zoom in on the preview, really check the preview, scroll scroll scroll, Delete photo and repeat until you get the shot they want. NOPE! This is the way. Use eye piece, snap your shot, move closer snap, move to the right snap, get down on the ground snap, snap, snap, snap... you get the point. fact is that you can take 10 photos with the same amount of battery life as it takes to fire up your preview screen for 2 seconds. I am not saying don't use preview, I do, but limit it as much as you possibly can. Taking time to study and delete photos in the field will greatly limit your battery life. instead bring more memory cards and when you get home delete on your computer after you see the shots on the big screen.

5. The Big One. Take care of the battery it self, Lithium batteries do not have "memory" like older style batteries did, so charge it. As a matter of fact the more time the battery spends above 40% charged the longer the life of the battery will be. So this means after every shoot charge your battery, even if it is not dead. Never leave a battery sitting for days completely dead! keep it charged and charge it often. Also Time is not your friend, a completely new and unused battery sitting on a shelf will loose 20% of its lifespan each year. so you might think that Ebay battery is a good deal but check the manufacture date!!! if it was made 3 years ago it only will maintain 40% of its original lifespan. not such a good deal now.

I hope this tip helped, Even if you do everything right it is always best to keep an extra battery with you because Murphy is always right at the wrong time!

Get Out There!


Composition Rule #2 "Balance"

The next rule of composition is "Balance". Using balance in an image is also pleasing to the eye. Basically take the Rule of Thirds but in stead of one subject in your shot you now have two subjects on opposite sides of the frame. Or a main subject and a secondary subject on opposite sides. This balancing act works in any direction, if the subjects are side by side, one above the other, or diagonal from each other in frame.  

You often hear me talk about telling a story. I try to look at my surroundings and come up with the shot that will not only look good but that will take you on a journey. Some of the journeys are more obvious than others but none the less the thought is there. The rules of Composition are excellent tools for telling stores with your photography! Look at the "Balance" image below, what story does it tell?

There are so many amazing people out there who think that just because they do not have fancy cameras and high dollar lenses that there photographs are not good! I am here to tell you all that I would rather look at Composed, thought provoking, iPhone images, than crisp boring DSLR images all day. A photograph is so much more than just and image. 

As we go step by step through the 10 Rules of Composition be open minded to them. Even if that particular rule does not fit well into your style, use it, play with it, think about it, learning is never ending. The more you know the more you grow as a photographer, and I am right here learning along with you. 

Thank you all for the awesome feedback on last months Newsletter! I really look forward to your comments, questions, photographs, and emails! 

Now Get Out There! 

William,

Composition Rule #1 "Rule Of Thirds"

Composition is the most important thing in photography. What is Composition? Simply put it is the Layout or structure of your shot. Have you ever looked at a photograph in a magazine or a painting in a gallery and though to yourself this is an amazing picture. But what makes it amazing? Well the answer is Composition. Artist have studied what it is that makes an image pleasing to the eye for centuries. You can see the rules of composition in the paintings, architecture, poetry, and clothing of our ancestors. Composition is the foundation that your image is built on and without a good foundation you will not have a good photograph. These rules are absolutely fundamental, knowing them and understanding them is what separates an amateur from a pro. There are many rules of composition, I like to focus on 10 rules that are the most important and widely known. Starting with rule #1 the Golden Rule of Photography, The Rule Of Thirds.

This is a very simple rule and when applied you will have great results. When setting up your shot imagine your viewfinder divided up into 3 equal parts vertically and 3 equal parts horizontally. When you do this you will be left with four intersections. These intersections are the main focus points for your eyes, and this is where your main subject of the shot should be located. It does not matter witch point you choose but keep in mind the story and movement of your shot. See the example shots below.

The best way to describe the Rule Of Thirds is to show you what it looks like in real world images. These two shot show the rule in action.  I have divided them up into thirds,  so you can see the four focal points of the photo. 

From the images you can see the points and how the shot was framed using the rule. But you can also see how I tried to convey a story and movement as well. Take the first shot of the snail. In this shot I wanted to show this snail making his way across the road, with so much out in front of him as he slowly goes along inch by inch. His journey is there in front of him. The next image of the bird in silhouette, I framed this image with the bird leaving the frame, almost escaping the frame. As if I came upon him sitting on the shore and he took flight to get away. He is exiting.  

Using the empty space in the shot as a way to convey movement and story, just another way to use the Rule Of Thirds to take great images.  

Metering

File Oct 01, 11 10 25 AM.jpeg

Lets talk about Metering with your DSLR. If you have seen this Button or setting in your camera and don't understand what the different setting means you are not along! most beginners don't even think about metering there shots, they normally let the camera do that for them and focus more on composition.

Once you get your camera out of Auto and really start breaking your images down you will be more focused on light! Light is what makes photography possible in the first place, without light there is no composition. I could talk all day about light but today lets talk about what in camera metering is all about!

When you find the Metering settings on your camera you will normally notice 3 different settings to choose from.

1. Matrix Metering

2. Center Weighted Metering

3. Spot Metering

As most of you know I like to break stuff down a simply as possible, I don't want to fill your head with useless tech garbage that you will never need to use or that will make these settings scary to try. So here we go!   

Matrix Metering.

Above you will see an image and a red box. When your camera is set to Matrix Metering mode the sensor inside the camera will look at all of the area inside the red box and take an average of light. So all of that sun set behind the deer is bright, the deer the ground the trees is all dark your camera will ad the dark space and the light space and find the middle ground value of the two. It will then use that value to adjust your exposure settings. 

This setting is great for landscapes because it takes into account a large area and gives you a balance of light across the entire scene.  

Center Weighted Metering

Same concept here. Center Weighted Metering will use a lot less of the frame as you can see from the red box to get that value. A good rule of thumb is if you look through your eyepiece you will have your focus box or the area with the cameras focus points for auto focus. This box is about the size of the area your camera is metering from.

This setting would be used when you have a pronounced subject (like the deer above) and you want your subject to have the best light and exposure possible. I actually shot this image in Center Weighted Metering. WHY? if I would have chosen Matrix the bright sky would have taken over the value and made the brown deer just a silhouette against the sky.      

Spot Metering

Lastly Spot Metering, the red box is now just a tiny spot in the center of the frame. much less of the frame is being taken into consideration with this setting.

often times people will use this in portraits to get dramatic shadows across the face of the subject. If you are old like me you will remember when you had pictures taken at school the photographer would hold a small black box with a white bubble on it up near your face and trigger the flash. he would then look at the numbers on the box to set his exposure settings. I know people still use this today but most wildlife and nature photographers do not. it is hard to not scare your deer away using a handheld light meter.


So I hope this was helpful. The only true way to learn and understand your camera is to take this info out into the field and try it out. Practice using these settings and you will enjoy your finished product so much more!

If you have any questions about this subject feel free to email me William@GilletteOutdoors.com

Now Get Out There!

We Are Inspired!

MeeMee, MM2_ on Instagram you have inspired me! On January 1st I posted a challenge to everyone, Hike 1000 miles in 2016. You are well on your way to making this a reality! I have really loved following you along your path on Instagram and have enjoyed cheering you along the way. I want more than anything to see you make this happen. All of your amazing photos and stories make me want to get out and hike.

Everyone should follow MeeMee on Instagram NOW! If you do not you are missing out on something great. Like her photos and make comments because this is an amazing accomplishment!

Thank you so much for LOVING the outdoors and sharing your ADVENTURES!


Outdoor Tip!

image.jpg

Here is a great outdoor, hiking, camping, life tip! Always keep a few of these lint rollers in your vehicle. After a hike in the great outdoors, and before you get back inside your vehicle take a second to lint roll all of your clothing thoroughly. What you find might surprise you!

Ticks and Chiggers,  these little pests can cause all sorts of problems for you, your family, and your pets. Removing them ASAP is so important. I have taken every precaution before a hike to keep these bugs off of me but at the end of the day I always seem to find a few on my clothing. The last thing I want to do is bring them into my vehicle, and risk bringing them home.

This lint roller has kept hundreds of ticks from getting to my skin, my car, my home, my dogs, and my family. 

Get Out There!!

Facts About Cypress Knees

The other day I was hiking in a FL swamp. I was snapping a few shots of some cool looking Cypress Knees and I started to wonder. Just what is a Cypress Knee?  

So I looked into it. I was shocked to find out that no one really knows. there are a few educated guesses as to what people think they are.

Theory one is that they help the tree get oxygen, these trees live in mostly stagnant water that is oxygen poor. The thought is that the Knee sticks up above the water level to allow it to let the root system breath. so it is like a snorkel I guess.

Theory two is that they help the tree support itself in the swampy soil. I guess that makes sense also, the knees do catch a lot of debris and always seem to have branches weeds mud and stuff stuck in them. I can see that helping the tree keep its roots in the ground.     

Here in the south this is a very common sight. I really enjoy the look and feel of a cypress swamp, the rusty reds and dark browns Highlighted by shades of bright green. The still air, and high humidity make for some great fog in the early morning hours and that thick canopy gives a soft box effect for photography all day.   

In your travels if you come across a cypress swamp, go in and have a look take some amazing photos. But remember to be safe because a lot of animals call this place home! 

This is just the begining.

image.jpg

Hello my name is William Gillette. I love Nature Photography, Hiking, and Camping. I also run a website GilletteOutdoors.com to help teach and inspire people to get out into the outdoors and use there cameras to share there amazing journey.

A lot of you reading that will have already know it, let me tell you some things you may not know.   

Born and raised in Central FL, I am 33 years old, I have a loving wife and two amazing kids. I am a sales manager for The Sports Authority in Kissimmee FL. Growing up I had always wanted to be a Director of Photography in film and tv, I have made a few feature length indie films that were successful in a few film festivals, one of the films was even picked up. I have always had this passion for photography, and if you read any of my blogs you will quickly realize that I have the worst spelling and grammar on the planet. Sorry!

I am currently working towards becoming a portrait and wedding photographer. If any of you have experience in this industry and want to give me some pointers I am open to suggestions!  


Merry Christmas

image.jpg

I hope that each and every one of you have a wonderful Christmas! To me it's not about a day it is more about the season. Spending this time with family and friends, traditions that make you smile, and doing something for someone who is in need.

it all starts today! So take a few minutes to sit down and make a list of all of the things you would like to do this Christmas: decorate the tree, go look at lights with the family, ice skating, decorate cookies, make a snowman, read a Christmas story to your grandkids, have a snowball fight, go out and find some magical outdoor scenes to photograph. Now spend the month crossing them off!   

As 2015 comes to an end I hope that each and every one of you look back on this year as one to remember.  

Merry Christmas  

William Gillette  

DIY Cable Cam

 Watch the video below to see how to assemble and rig this great little DIY Cable Cam!  

GoPro or Cell Phone Cable Cam

GoPro or Cell Phone Cable Cam

Supplies you will need

5ft - 1/2 PVC SCH 40 Pipe ( cut 3-12inch 2-1  1/2inch and use what's left to roll your cord on)

3 - 1/2 PVC Male Adapters

2 - 1/2 PVC Female Adapters

1 - 1/2 PVC Coupling

1 - 1/2 PVC Tee SxSxFPT

2 - 1/2 PVC Caps

1 - 1/2 PVC Plug

PVC Primer  

PVC Glue

1 set of 1 1/4 patio Door Steel Wheels

3 - Flat Corner Braces 2 1/2 inch  

6 - 1/4-20 x 1 1/4 inch Machine Screws with nuts

1 - 1/4-20 x 2 1/2 inch Machine Screws

1 - 1/4-20 Wing Nut

4 - 1/4-20 Nylon Lock Nuts

2 - #6 5/8inch Sheet Metal Screws

1 - 1/4-20 3/4 inch Machine Screw with nut

2 - Carabiners with key rings ( see picture below)

1 can of Spray Paint that Bonds To Plastic you pick the color

150 feet of 550 cord black

10 feet of 550 cord any color

2 - Aluminum Carabiners

1 - Figure 9 Carabiner


Found this at my local Home Depot.  

Found this at my local Home Depot.  

DIY Cable Camera  

DIY Cable Camera  

I designed the rig to break down into 4 pieces that could easily be put in my backpack. If you did not need this feature you could omit the male and female adapters and get a standard 1/2 tee that could be glued on all three sides to save some money also the break is a nice feature but can be omitted as well.  

If you are mounting a GoPro, the standard tripod adapter screws directly to the bottom.


GoPro mounted to Cable Cam

GoPro mounted to Cable Cam

If you want to mount you cell phone they make a tripod cell phone holder that works great.  


I always love to see your work, email me photos of your completed rig and videos from your projects using the cable cam!  

Click here to contact me 

Guest Blogger, John Shepard

Hey Will,


Saw your newsletter photo contest on closeups. I dont have instagram or twitter but just wanted to share some cool closeups. Maybe to help your less skilled and and poorer photo enthusiasts like myself that you dont always need deep pockets to nab some good shots (although winning the lottery would let me get some new pic taking toys). I took these pics using the standard kit lens (18-55mm) and my 55-200mm zoom lens.


Photo By John Shepard

Photo By John Shepard

The flower is on one of my wife's cactus's she bought from walmart years ago. I never knew it flowered until we had a full moon one night and this is what I walked out to early morning on the porch. I used the 18-55mm

Photo By John Shepard

Photo By John Shepard

The grasshopper (called the Lubber grasshopper) was chilling on my sun  flowers one evening. I stood a bit of a distance back and used my 55-200mm and changed the focal settings until I nabbed these. I was lucky enough to have him chill for a bit.

Photo By John Shepard

Photo By John Shepard

The wolf spider I managed to capture at our apartment. I grabbed a wine glass and a piece of printer paper to trap it. I used my 18-55mm

Photo By John Shepard

Photo By John Shepard

Photo By John Shepard

Photo By John Shepard

the two turtles we netted out of our canal in the backyard in Punta Gorda The one is called a red ear (aptly named) the other I don't quite remember we just thought it looked funny. The one with the acorn hat makes it look like an angry clown. I used my 55-200mm


Anywho, not looking to enter the contest, just wanted to share some fun ones. Happy shooting!.....of cameras not people...well I guess shooting people with cameras is OK too.


Thanks for sharing all of these great shots with us John. I love the turtle with the acorn hat! LOL! Keep up the great work and we really look forward to seeing some more great shots from you in the future. 

-Will