Composition Rule #1

Composition is the most important thing in photography. What is Composition? Simply put it is the Layout or structure of your shot. Have you ever looked at a photograph in a magazine or a painting in a gallery and though to yourself this is an amazing picture. But what makes it amazing? Well the answer is Composition. Artest have studyed what it is that makes an image pleasing to the eye for centuries. You can see the rules of composition in the paintings, architecture, potery, and clothing of our ancestors. Composition is the foundation that your image is built on and without a good foundation you will not have a good photograph. These rules are absolutely fundamental, knowing them and understanding them is what separates an amateur from a pro. There are many rules of composition, I like to focus on 10 rules that are the most important and widely known. Starting with rule #1 the Golden Rule of Photoagraphy, The Rule Of Thirds.


This is a very simple rule and when applied you will have great results. When setting up your shot imagine your viewfinder divided up into 3 equal parts vertically and 3 equal parts horizontally. When you do this you will be left with four intersections. These intersections are the main focus points for your eyes, and this is where your main subject of the shot should be located. It does not matter witch point you choose but keep in mind the story and movement of your shot. See the example shots below.


image.jpg

The best way to describe the Rule Of Thirds is to show you what it looks like in real world images. These two shot show the rule in action.  I have divided them up into thirds,  so you can see the four focal points of the photo. 

image.jpg

From the images you can see the points and how the shot was framed using the rule. But you can also see how I tried to convey a story and movement as well. Take the first shot of the snail. In this shot I wanted to show this snail making his way across the road, with so much out in front of him as he slowly goes along inch by inch. His journey is there in front of him. The next image of the bird in silhouette, I framed this image with the bird leaving the frame, almost escaping the frame. As if I came upon him sitting on the shore and he took flight to get away. He is exiting.  

Using the empty space in the shot as a way to convey movement and story, just another way to use the Rule Of Thirds to take great images.  

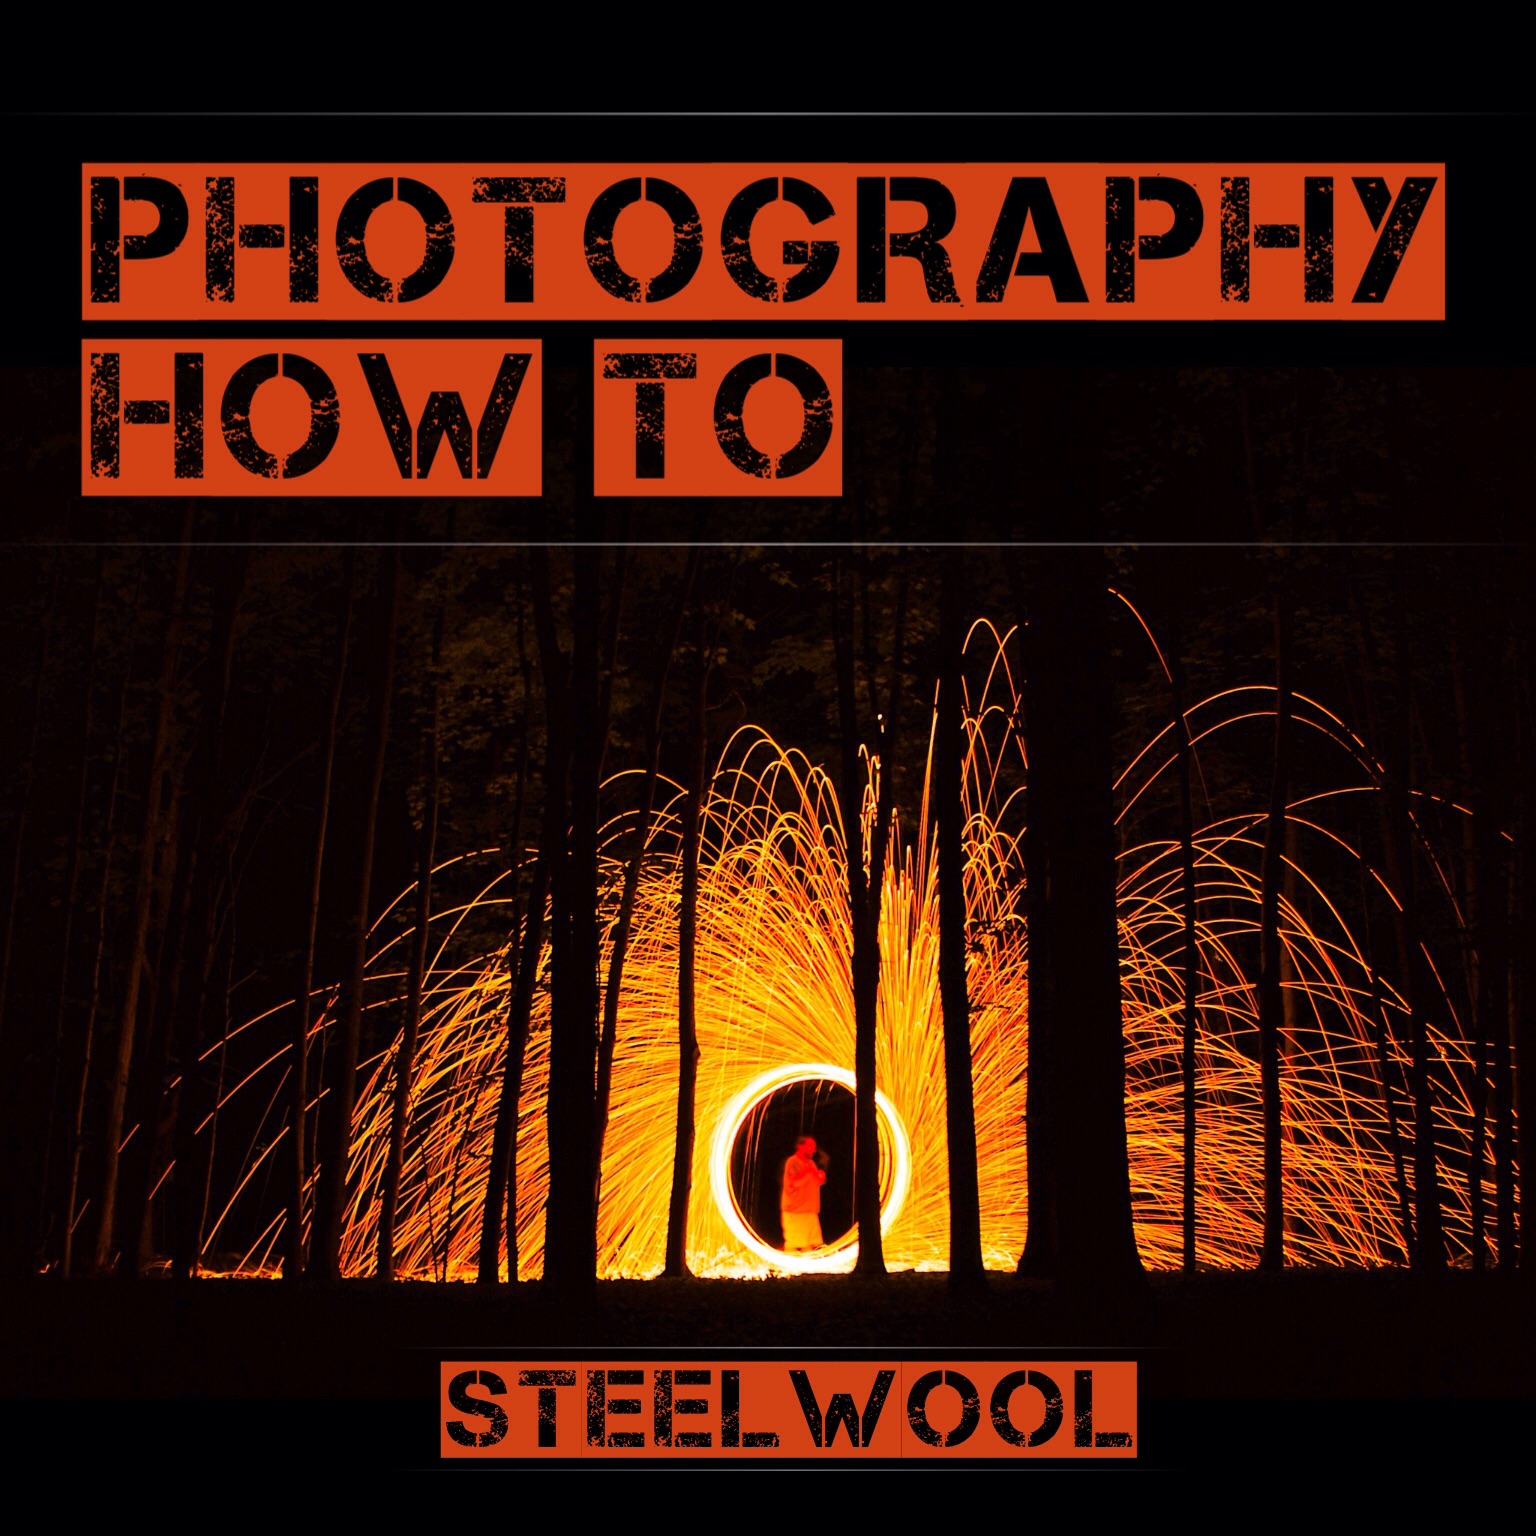
Did you like this post? The 10 rules of composition posts started on the GO Newsletter. If your not a member of this FREE Newsletter, join today! 

Friend Me! It Will Be Fun!

image.jpg

Over the next 6 days I will be doing some traveling to a great American city. One rich in history and beauty. What will I be doing? Geocaching, hiking, photography, history, celebrating my wife birthday, visiting some beautiful places and so much more! Where are we going? You need to follow along to find out! I am going to be posting all photos from the trip on Facebook this time. So if you would like to come along for the ride friend me at www.facebook.com/gilletteoutdoors i will see you there! 

William Gillette

Depth Of Field

Photo by William Gillette

Photo by William Gillette

One thing that separates a DSLR camera from your standard point and shoot is the dramatic range when it comes to Depth of field. 

depth of field (DOF): is the distance between the nearest and farthest objects in a scene that appear acceptably sharp in an image.

TRY THIS

Put your camera on a tripod, go outside and find a fence. Set up yor camera so the legs of your tripod are touching the bottom of the fence and rotate the camera so it is looking down the fence line. Set your DSLR setting to "A" (Aperture Priority mode) and adjust you the dial on your camera that controls the Aperture setting or the F# on your cameras readout. If you have never adjusted these setting on your camera dust off the manual or search your cameras model number online for info on your specific cameras adjustments. 

Adjust the apriture (F#) to the lowest possible number for you camera, each lense has a different range of apriture so this number will be different depending on you lense. Take a picture down the fence line.  

Now without moving your camera adjust the apriture (F#) setting to the highest possible number. Take a picture down the fence line.

Compare the images.  


You will see that they are very different. Let's talk about the first image you took, with the lowest apriture (F#) setting. In this image the section of fence closest to the camera should be blurry and out of focus, as the fence gets farther away it should become clear and in focus and than as the fence goes on it will become out of focus again. This is short or shallow Depth Of Field.

Now in the second image the fence should be almost completely in focus the entire way. This is a long Depth Of Field.  


Left apriture F22, Right apriture F3.5

Left apriture F22, Right apriture F3.5

Depth of field is a great tool for telling a story in an image, it places the focal point of your shot front and center. Also the out of focus portion of the image adds mistery to the shot. Play around with your apriture setting and practice useing this setting. It's setting like this that make good images great images. 

Photography Basics : The Rule Of Thirds

image.jpg

The rule of thirds is a very basic rule that is so simple but goes so far when it comes to its application in nature photography. 

Rule Of Thirds ; dividing an image in three equal parts vertically and three equal parts horizontally. The intersections made by these lines are the focal points of an image.    

image.jpg
image.jpg

If you look at these images you will see that I have divided them as per the rule of thirds. When I set up these shots I purposely placed the subjects that I wanted to highlight into the intersections. By doing this I made these subjects the first thing you look at when you see the photo. Your eyes will go to these focal points first automatically without you even  knowing it is happening. 

Why? It is a natural thing that you do. Survival as a human depends on it! You have been doing it your entire life. Every day you use this skill without thinking twice about it. You first learned it as a baby. When you where a baby and could not communicate with your mom and dad you looked at there faces to get your information. More importantly you looked at there eyes and mouth. If they were smiling you knew everything was ok and you where safe, there eyes bright and wide and the corners of there mouth upturned. If they where scared  you also knew to stay close to mom and dad. If you have kids you know how this works. It is the reason a baby smiles when you smile it makes them feel safe. 


"Controlling Light" Part 4

This is the last video in a four part series called "Controlling Light". A photography basics video that will help you better understand the Manual (M) settings on your camera. Knowing what these settings are and how they affect your camera will help you understand how to use them


Phototogrphy Quick Tip!

Photo by William Gillette

Photo by William Gillette

 Here is a Photography Quick Tip. Straight lines are pleasing to the eye in photographs because they give your eye a path to follow through the shot. Your eye will automatically go to the end of this bridge first, because that is where all of the lines lead. In Landscape photography this is used often with images of roads, paths, fences, even rows of bushes or pines on a hillside can give you great lines. Practice useing straight lines like this to help your images tell a story to the viewer. When I framed up this shot I wanted to show the viewer how long and narrow this bridge over the gorge was. I chose this high angle with my focal path directly down the center of the image. I tried to give my viewer the same feeling and focal point I had when I first came up to this bridge. Only AFTER I located my destination point on the bridge did I look around at all of the beautiful view, and that is the way I wanted my viewer to see it as well.

Keep in mind the story you are telling may not only be visual but also mental. If I shot this image at eye level, you would have seen the bridge I wanted you to see, but by elevating the camera 12 feet above the walkway of the bridge I tried to capture the feeling you get when stepping out onto a suspension bridge 100 feet over a river. 

Practice is the only way to become a good story teller in photography. It may take 200 shots from 30 angles to get the look and feel you want. Keep try, keep thinking outside the box "pixels are free" every photographer in the world has 100 times more bad shots than good. After you get that shot that tells the story you want to tell, you will always remember the technique you used to get it for next time. And working through a shot like that is what makes good photographers great photographers! 

Now Get Out There!  

"Controlling Light" Part 3


  This is the third video in a four part series called "Controlling Light". A photography basics video that will help you better understand the Manual (M) settings on your camera. Knowing what these settings are and how they affect your camera will help you understand how to use them

Source: http://

"Controlling Light" Part 2

This is the second video in a four part series called "Controlling Light". A photography basics video that will help you better understand the Manual (M) settings on your camera. Knowing what these settings are and how they affect your camera will help you understand how to use them

"Controlling Light" Part 1

This is the first video in a four part series called "Controlling Light". A photography basics video that will help you better understand the Manual (M) settings on your camera. Knowing what these settings are and how they affect your camera will help you understand how to use them.